|
An infographic was posted recently on Facebook by Peleton Magazine (image below) to which a good friend of mine responded with it being one of the dumbest things she had ever seen and that it would piss drivers off even more with cyclists. I totally respect what she said and where she was coming from with this because at first glance it may appear that way. BUT once you have experienced all of these scenarios first hand you will see what Peleton Magazine is saying here and why they posted this as a good reminder. Here was my response to my friend. I feel inclined to share this with you as I believe it is a really important information for new cyclists and a great reminder for the experienced ones. "This is a really good infographic. As you know, I have been riding for a lot of years. I have had each of these scenarios happen to me. The sideswipe is what I call getting “buzzed” or “squeezed”. This is especially important going up hills. You stay out a little more than usual towards the middle of the road because believe it or not cars are crazy and will pass you in the middle of the hill not knowing that another car is actually coming over the top putting everyone in a life and death situation. The idea is that staying out to the left deters them from making that move. It happened to me, Andrew and a friend this summer on a blind corner. It was scary with tires squawking and everything! The other close call I had was in North Vancouver with the Right Hook. Had I known to “own my lane” it would never have happened. I nearly went right into the back of him. I braked as hard as I could and was skidding sideways to avoid him. I was shaking the rest of my ride home and he didn’t stop to see if I was okay. AND with the Drive Out and the Left Cross situations. A good and experienced rider will tell you that you should slow down in this situation and make eye contact with the driver to make sure he/she knows you are there. I do this all the time and this is what I teach my clients. It is being as aware as possible of your surroundings and having good defensive skills (most people don’t know your bike will skid and wipe you out or flat your tire if you brake hard…both have happened to me :S) among a number of other things. Having said all that, we don’t ride out towards the middle of the lane like that all the time. Just in certain situations like riding in a city with lots of traffic and intersections and on hills. Drivers have to learn to slow down and have patience around bikes because you’re right…we don’t stand a chance against them. Bikes are here to stay though and there will be more and more of us on the road in the coming years. I really feel that there is a lack of education between drivers and cyclists on why we do what we do as riders on our bikes. We are only trying to keep ourselves as safe and as visible as possible. Mind you there are riders out there that give us all a bad name hence the reason why I teach what I teach my clients. The riders who come through my clinics end up being awesome riders and this is one of big reasons I teach. My motto is to keep riders and drivers as safe as possible by teaching bike skills, proper etiquette and safety. Anyway, just wanted to shed some light on that infographic. I know it may seem crazy to recommend riding like that but it does work out for the best in most situations. :)" Hope you took a little something away from all of that. And if you would like to come out and be a part of one of my clinics, stay tuned for the unveiling of all of my cycling clinics for 2015! I would love to have you! Below the infographic you can sign up for my newsletter which means you will be the FIRST to know about them as I announce them! :) Cheers! 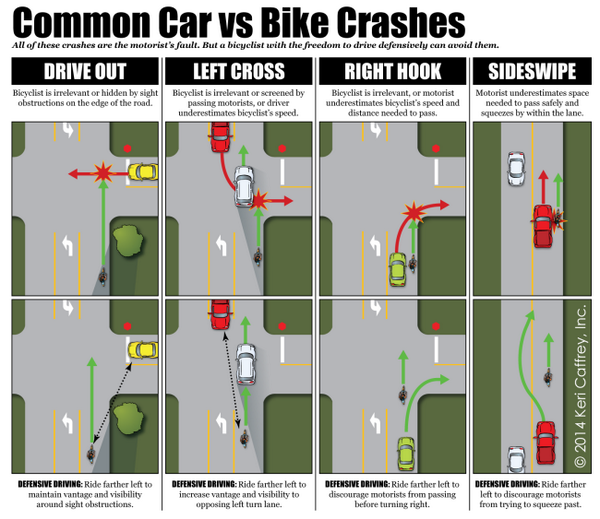
0 Comments
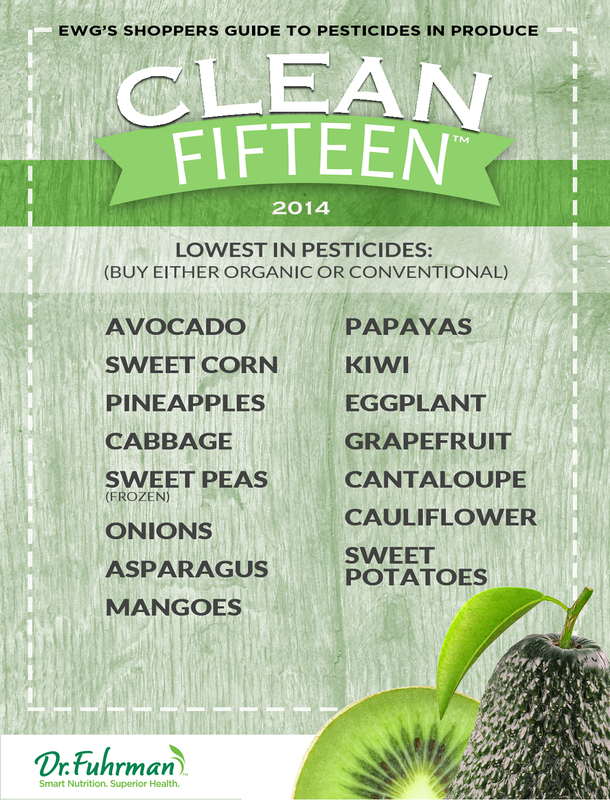
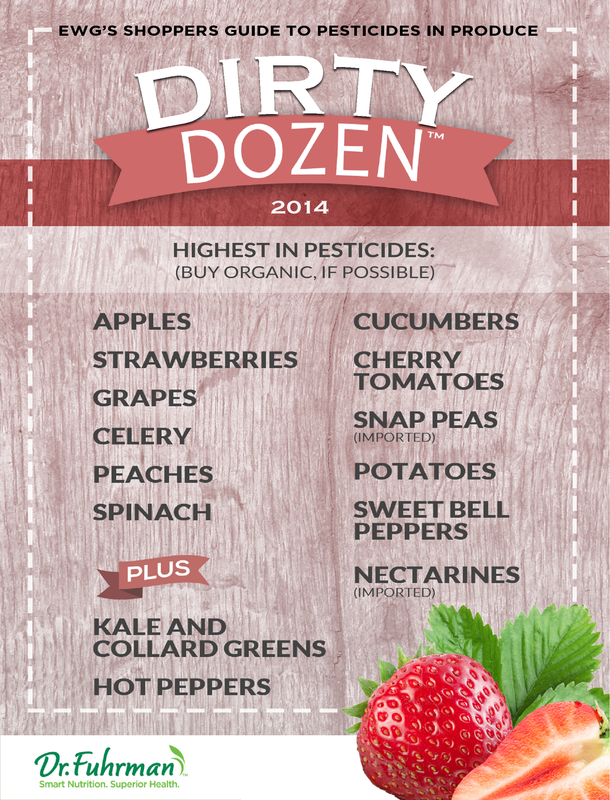
The Environmental Working Group's list of produce called the "Clean 15" and the “Dirty Dozen” are finally here! Yippee! This is something that I give to all of my clients as they transition to healthier eating. Finding organic produce can be tricky sometimes and also the pretty penny associated with it. EWG lets us know which 15 fruits and vegetables have the lowest amount of pesticide residue AND which 12 fruits and vegetables have the highest amount of pesticide residue. A few keys points that I love and agree with in this article are: 1. It is better to eat fruits and vegetables grown and harvested using pesticides than to not eat them at all. I couldn’t agree more. It can get super confusing on our journey to better health! If you cannot find organic produce in your area or it is not feasible please know that you should still be eating your fruits and veggies. The Clean 15 and Dirty Dozen are guidelines for you to minimize your exposure to pesticides. 2. It makes sense to peel fruits, unless you are able to purchase them organic. Remove and discard the outermost leaves of lettuce and cabbage and peel the skin off potatoes, if they are not organically grown. For other surfaces that cannot be peeled, you can wash them with soap and water or a vegetable wash. You can find vegetable wash in your local health food store or you can make your own using equal parts vinegar and water. 3. When we buy organic, we: (a) Minimize our exposure to pesticides (b) Eat better tasting food (c) Eat food with more antioxidants which help to combat toxins and diseases such as cancer (d) Minimize the amount of pesticides our environment is exposed to (e) Support and protect organic and local farmers (f) Increase the demand for organic produce (g) Decrease the number of farm workers exposed to potentially harmful chemicals (h) Help protect insects especially the bees and worms If you’re new to this idea, cut the below pictures out and put them in your wallet or bag. Then when you’re at the grocery store you can just pull them out and away you go. To read more of this article from Joel Fuhrman, M.D. click here http://bit.ly/1oNVjrF.
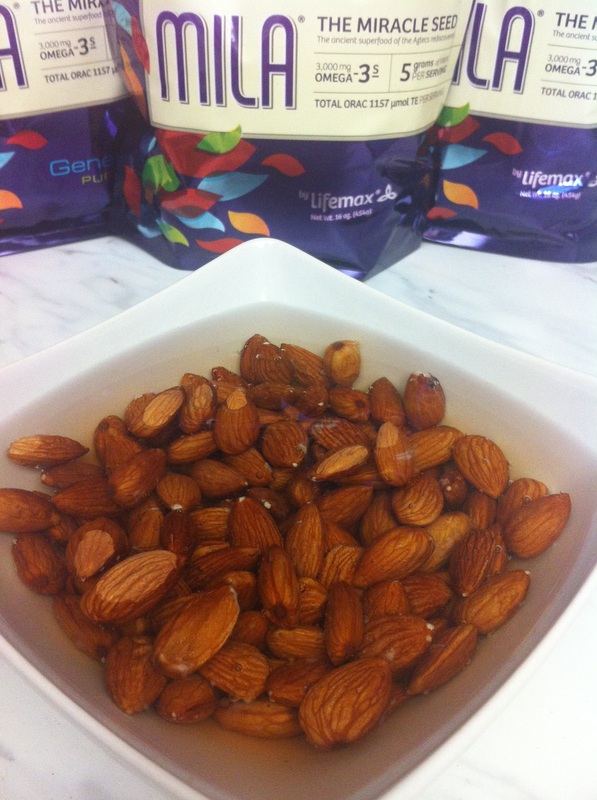
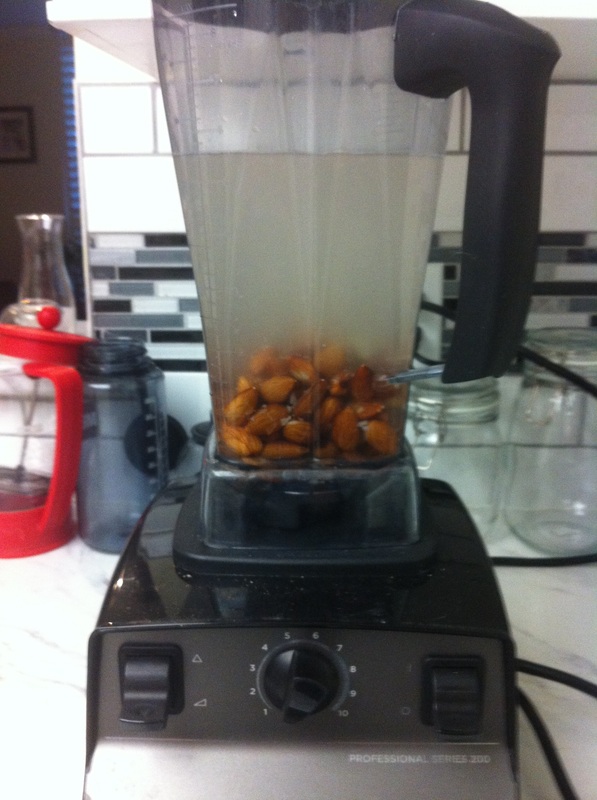
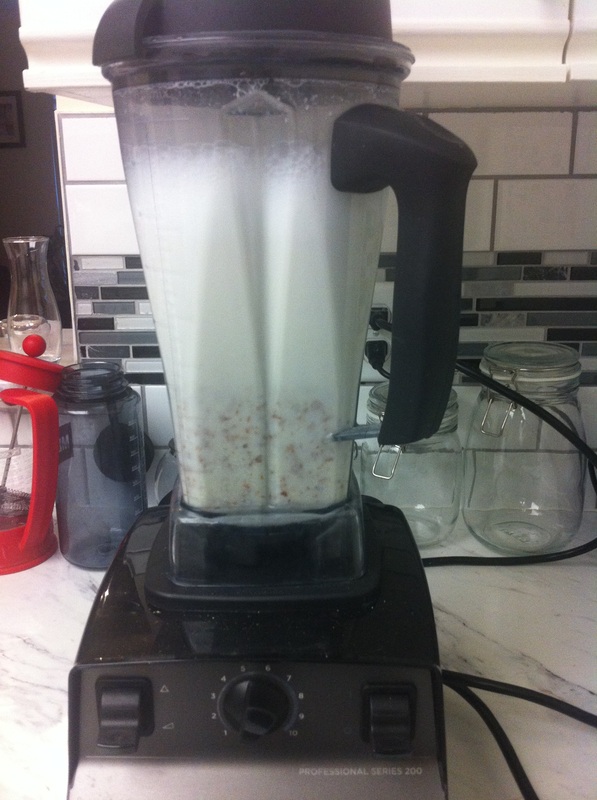
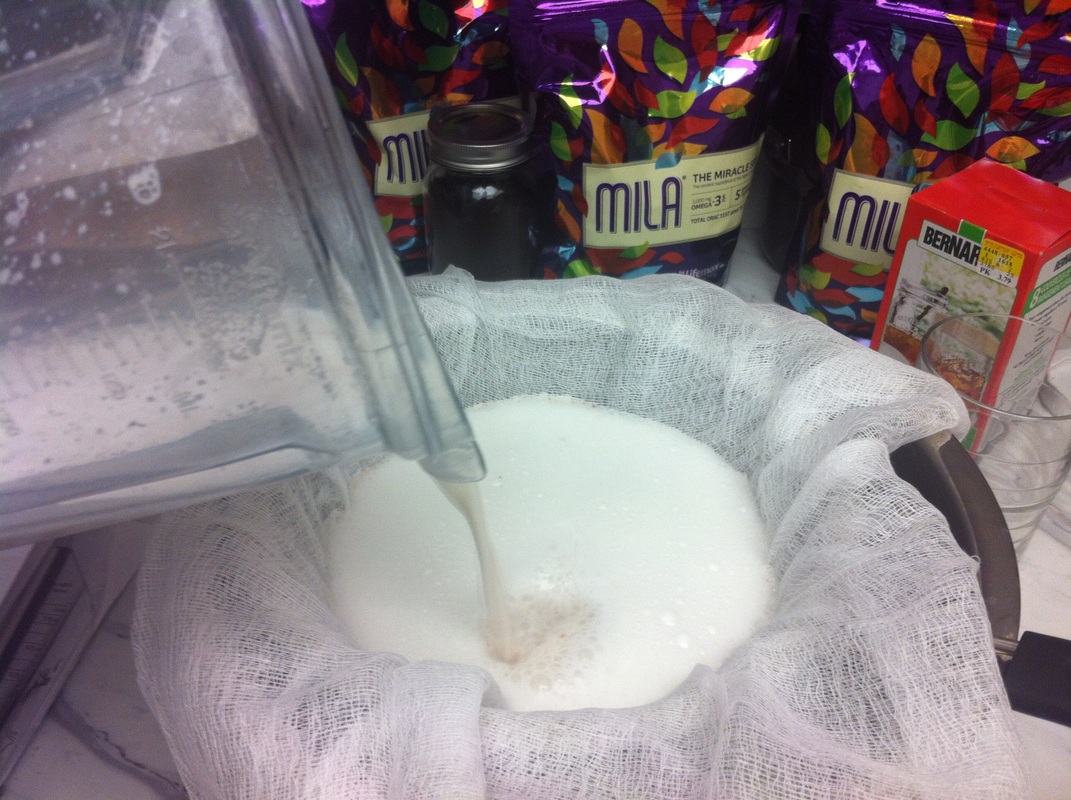
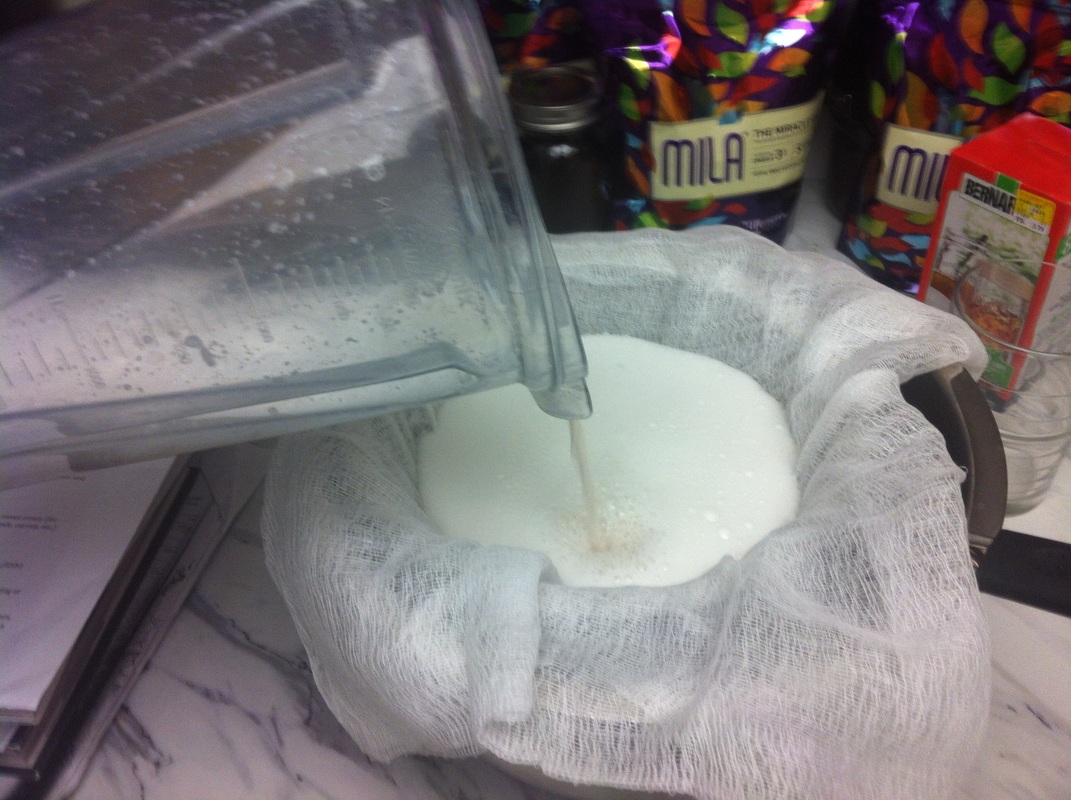
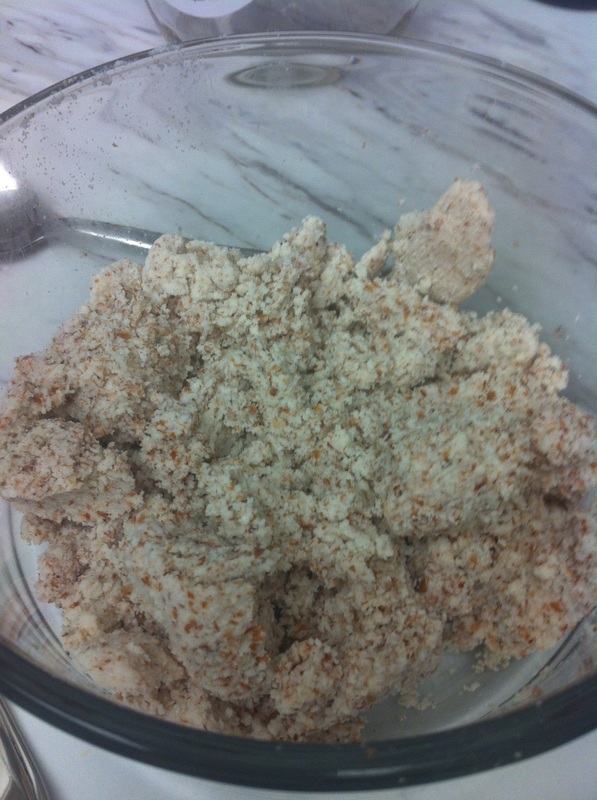
Recently I made the switch from full fat milk to homemade almond milk and there is no turning back! I knew the change was coming...in fact there were two significant changes...both my MILK and CEREAL choices. I love cereal! Up until about a month and a half ago I was choosing Nature's Path Heritage Flakes. To me it is about the best you can get for a pre-made store bought cereal. I have a very busy lifestyle including a day job and a commute AND I'm given'r with Pura Vida Performance and the Pura Vida Mavericks and loving it. HOWEVER, I have limited time! I'm sure you can relate to this in some way with your life as well. We are BUSY bees! What sort of spurred this all on was the fact that I was a bit low energy and I also noticed that I was having issues with clearing my throat a lot in the morning. AND with being a "holistic" nutritionist, I believe that we can eat most foods in moderation. When I stepped back and took at look at what I thought could be the culprut of my "ahemmm" issues it was a total no-brainer. DAIRY!! I was having dairy every day with my breakfast and coffee! I originally went to the health food section of Zehrs and had a look at all the almond, coconut and rice milks on the shelf to see what was in them. My oh my have they changed over the past few years my friends! There are now 10 ingredients in Almond Breeze Unsweetened Original almond milk. Yikarumba! I thought to myself, it's high time to start making my own! Believe it or not, up until a month ago, I had never taken the time to make any nut milk of any kind ever before. Whaaaaaaaaaaat?!?! Yes it's true (said sheepishly). :) I always thought of it as a BIG production and boy was I wrong. It's takes a whopping 10-15 minutes with an overnight to 2 day soak time to soften the almond which is easy peasy. Now THAT is totally doable in my books. If you agree then lets get on with it! But before we do, even though we have busy lives, we have to be sure to take care of our health because without it what do we have. Small steps like these are great investments in our health and the health of your loved ones. Making your own almond milk at home is easy peasy! How To Make Homemade Almond MilkMakes about 4 cups
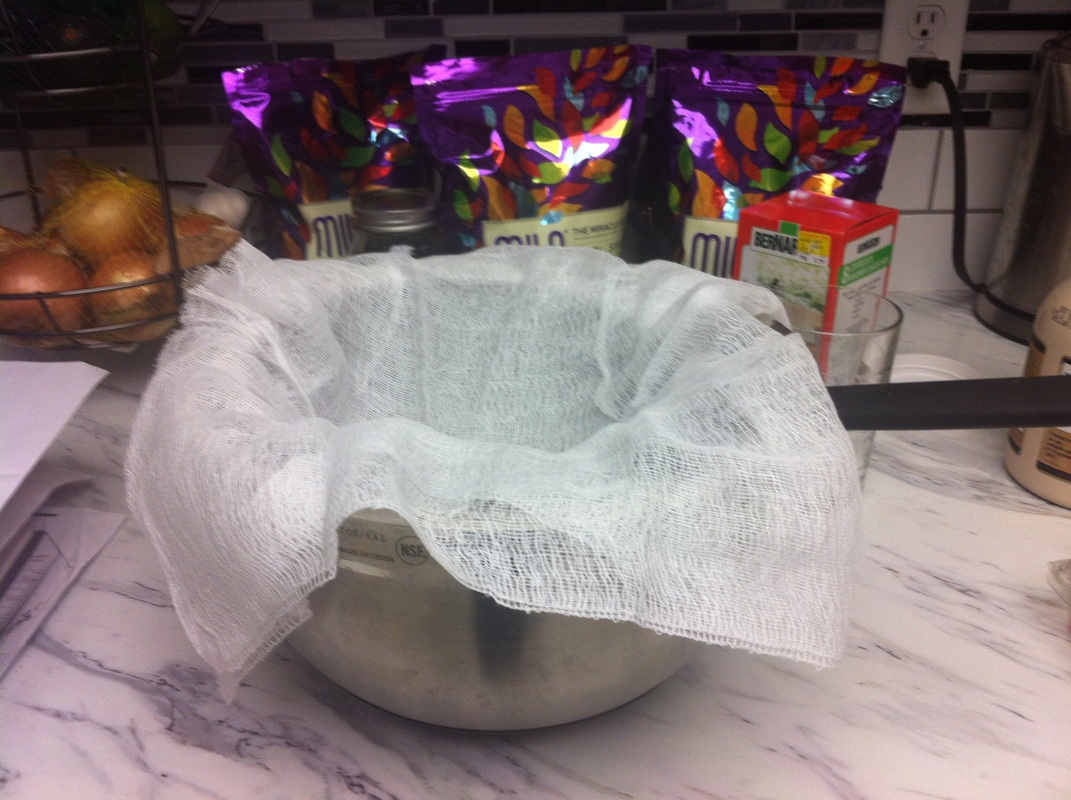
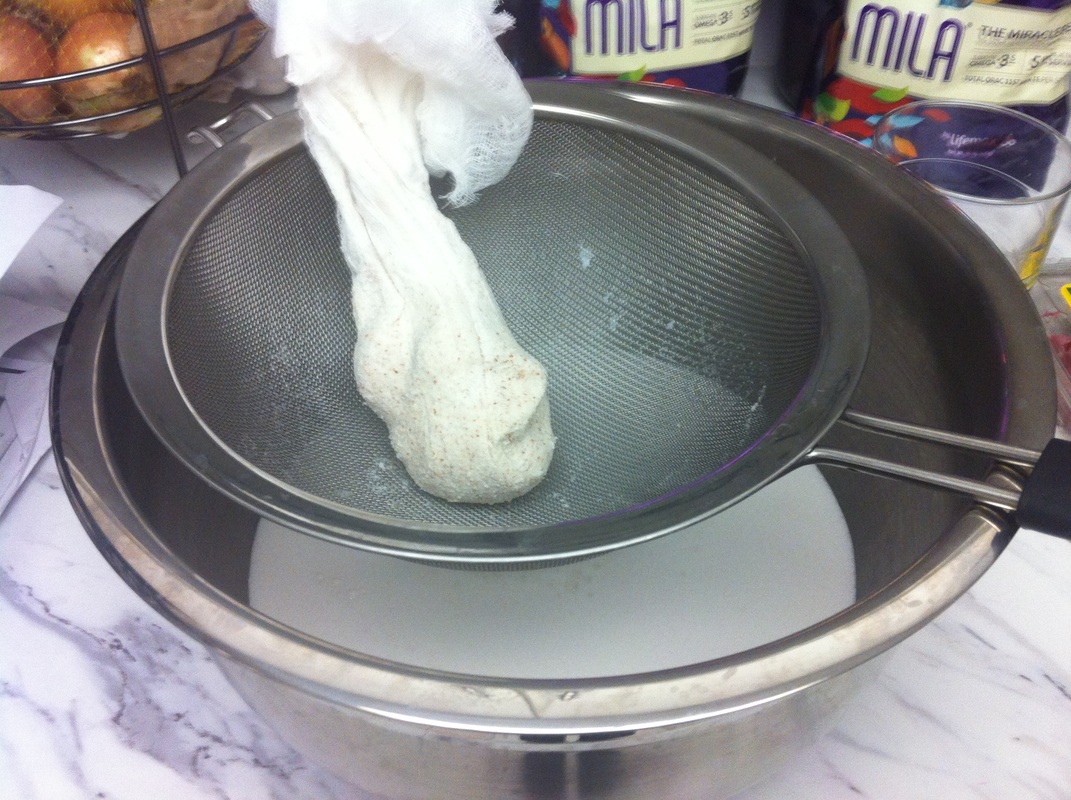
Ingredients: 1 cup raw almonds, preferably organic 4 cups water, plus more for soaking Pinch of sea salt Optional: 1 tbsp maple syrup (you can use unpasteurized honey or coconut sugar) 1/2 tsp cinnamon (other options: nutmeg, unsweetened cocao or vanilla) Equipment: Bowls (big enough for your strainer to rest in - see pic above) Strainer Measuring cup Blender (high speed preferably) Fine-mesh nut bag or cheese cloth Instructions:
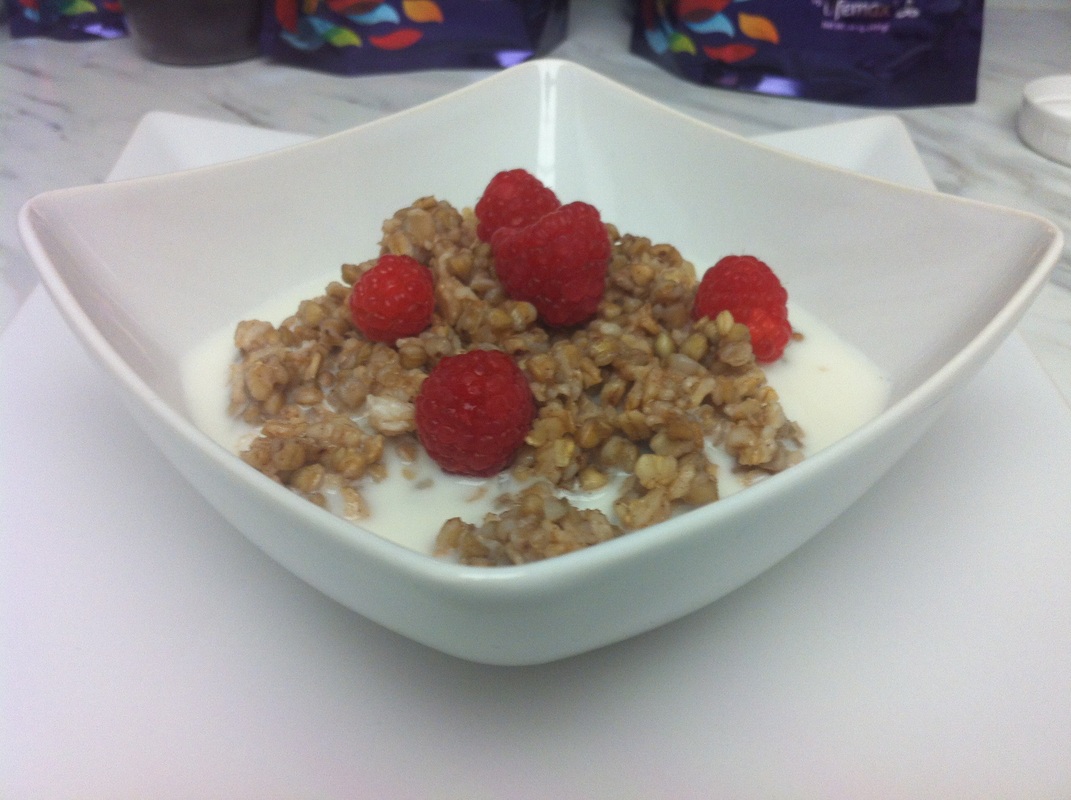
Also, please note that you can change it up by using other nuts like cashews or hazelnuts. Mmmmmm! Enjoy! Paige xo I’m going to be sending out my first newsletter this week! If you’d like to be a part of the Pura Vida Revolution and get "REAL" about your health with my monthly tips and inspiration, please insert your name and email in the boxes below and hit subscribe. This month's is going to have a recipe! :) Hope to catch you there.  |
Paige RoyalQuestions or Comments? 
LET'S CONNECTCategories
All
Archives
March 2020
|

 RSS Feed